Wednesday, 27 November 2013

The Roasting of the Peppers


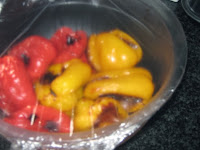
Another vegetable that is very tasty and healthy is the Red Pepper. Very rich in vitamin C. I like them raw and cooked. I bought a huge bag of red and yellow ones the other day on special, so I decided to roast them. It's so easy.

Just put them in a roasting pan and roast them at 180°C for about 45 minutes. Turn them round every 15 minutes or so. When they come out they will be soft and covered with brown spots.


Place them in a bowl covered with Clingfilm, OR in a plastic bag and leave until completely cool. You can now remove the skins and seeds easily. Slice up in a bowl and dress with olive oil and lemon juice. I like to mix with olives. You can also purée and use as a dip, or use as an ingredient in a myriad other recipes.


Red Cabbage with White Wine

I have fond memories of Christmas Eve dinner at my Aunt and Uncles house in Switzerland where everything is very traditional, so the same dishes are served every year. Every year on Christmas Eve my Aunt would make Red Cabbage with Chestnuts. Now that Christmas is coming I'm thinking of that delicious dish, and although we don't have chestnuts here right now in South Africa, I have a lovely recipe that tastes really good and one can even add walnuts or pecans.

INGREDIENTS

½ Red cabbage sliced up finely.
1 Granny Smith Apple peeled, cored and diced.
2 Onions, sliced
1 Tablespoon Apple Cider Vinegar
250 ml White wine
1 Tablespoon juniper berries
1 Teaspoon ground allspice
½ Teaspoon pepper
1 pinch ground nutmeg
1 pinch ground cloves
2 Tablespoons honey
a knob of butter and 2 Tablespoons oil
salt

METHOD

Heat up the oil and butter in a pan and fry the onion until soft.
Add the apple and all the other ingredients including the cabbage. Make sure everything is well mixed together.
Set on a low heat with the lid on and cook for about an hour. Salt should be according to your own taste. If you prefer it to be sweeter you can add some more honey, or even some brown sugar.

Sesame Swiss Chard with Mushrooms


Swiss Chard is extremely healthy but many people don't like it's bitter taste very much, so in order to reap it's health benefits they smother it in white sauce, which is not terribly healthy and hugely fattening. Cooking it this way, you are able to eat it hot or cold and I think it tastes pretty good.

 INGREDIENTS

300 g Swiss Chard
250 g Button Mushrooms, quartered.
1 onion, sliced
3 cloves garlic, minced.
3 Tablespoons Lemon Juice
1 Tablespoon Sesame Oil
1 Tablespoon Olive Oil
1 Tablespoon sesame seeds, roasted dry in a pan.
salt and pepper to taste

Wash and chop up the Swiss Chard.
Steam in a pot with just a little water that's attached to the spinach from washing, on a low heat until wilted.
Drain off all excess water.
Fry the onion in a pan until soft.
Add the garlic for another minute or 2 until soft.
Add the mushrooms and stir-fry until done.
Add the spinach
Pour over the lemon juice, sesame oil and olive oil.
Mix well.
Place in a dish and sprinkle over the sesame seeds.

Health Kick

I'm taking advantage of the fact that both my son and my husband are away, to go on a little health kick/detox. I've had some rather nasty health issues this year. In April I was told that I had a tumour on my spinal cord. Yikes!!  Fortunately upon seeing a second neurosurgeon he informed me that he wasn't convinced that it was a tumour at all, but rather something of an inflammatory nature. After asking me whether I had had any vaccines recently and hearing that I had had a yellowfever vaccine in June last year, he said that he was sure that that was probably the cause of whatever was on my spinal cord, causing me all sorts of neuropathic symptoms such as burning, pins and needles, shocks and general weakness in my limbs. He sent me back to the neurologist, who wasn't convinced, but after he had consulted with some of his colleagues at Groote Schuur Hospital, decided that the surgeon was probably right. So I'm none the wiser really, and no-one is going anywhere near my spinal cord as long as the situation is so uncertain. A second MRI showed that it had decreased in size and a lumbar puncture and numerous blood tests have ruled out most other possible causes. I've found that large dosages of vitamin B complex and B12 helps to relieve the symptoms but just when I think I'm starting to feel better, WHAM! it hits me again. What has helped me A LOT is  Body Stress Release   which is a non-therapeutic complementary health technique which assists the body to release stored tension.

So now I've decided to cut out all meat, dairy, grains as well as coffee and alcohol for a few days and give myself a bit of a detox. See if it helps.

Basically all I'm eating is fruit and vegetables and lots of water and Rooibos tea with lemon juice. For breakfast I've been eating fruit. I'm finding it quite boring so I try and do things to make it more interesting. This is what I did this morning.

I combined a handful of blueberries, Raspberries, 1 kiwifruit sliced up and half a banana sliced up. I mashed up the other half banana, added a pinch and a half of cinnamon and 2 teaspoons of honey. After pouring the banana mixture over the fruit I sprinkled on some pumpkin seeds and almond flakes. All of these fruits, nuts and seeds are rich in vitamins, minerals and anti-oxidants. You can look it all up here

Another vegetable I really like is the artichoke and there are lots of them in the shops right now. They are very easy to cook. Just put some lemon juice in a pot of water and steam for about 20-30 minutes. Each leaf has a little bit of the heart on it and after dipping it into some vinaigrette dressing or hot butter you can just scrape it off with your teeth and discard the leaf. When you get to the middle you must then scrape away the "choke" and you can eat the heart with some dressing. You can also trim and remove the heart before cooking, in which case it looks like this, and a lot more elegant, especially for entertaining.

ARTECHOKE WITH BALSAMIC VINEGAR AND OLIVE OIL

Yesterday I had the Mother of all headaches. I hope that's a good sign. It is, I know, a normal symptom of detox. Still got all the neuropathy symptoms. I will be posting some more vegetable recipes because as that's all I can eat, I'm trying to at least make it more interesting.


Tuesday, 19 November 2013

Asian Roast Chicken

Ok.  Today we were planning on having a barbeque, so I bought a nice plump Free Range Chicken to spatchcock. Well the weather wasn't too good so I decided to roast it instead. As usual I winged it and as I felt like Asian, this is what I did.

In a roasting pan I put:

1 can coconut milk
1 stick lemon grass - chopped
grated ginger- about a 3cm piece
4 cloves of garlic sliced
1 Tablespoon fish sauce
about 1 tablespoon palm sugar
2 birds eye chillies

I seasoned the chicken with powdered ginger, cayenne pepper, paprika, salt, black pepper and sesame oil and massaged the whole lot into the chicken. I placed it on a rack in the pan.

Roasted the chicken for 1 hour. The juices from the chicken added to the delicious eastern flavours and the wonderful smell of sesame oil permeated the house as it cooked.

Once I had carved up the chicken, I added about a third of a cup of lemon juice to the pan and mixed thoroughly. I strained the sauce over the chicken so that all the bits of lemon grass etc., stayed behind.  Served it with roasted baby potatoes. (not terribly Asian, but yummy. Lets call it Fusion.)

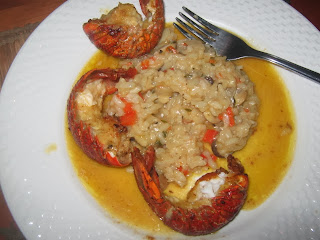
Winner Winner Crayfish Dinner

Someone gave us a box of crayfish tails. Yesterday I decided that they'd been in the freezer long enough and were crying out to be eaten. They were so small. I can't believe they're actually legal. 20 years ago they wouldn't have been.

Anyway, that being said, they were quite delicious. With crayfish, the best way to prepare them is to keep it simple. I decided to pan fry them in olive oil and butter and serve with a mushroom risotto and a simple garden salad of watercress, tomato, cucumber and avocado.

To prepare the crayfish tails you have to remove the soft shell from underneath with a pair of scissors. As you pull it away carefully, the intestine, which is attached to the shell should come away with it. When preparing crayfish and prawns it is very important to clean them well.


PULL INTESTINE OUT CLEANLY
DREDGE WITH FLOUR AFTER SEASONING
 
 
Dry the flesh well with a paper towel season with garlic salt and dredge with flour.
 
Heat up some olive oil and butter in a pan and when sizzling, place the tail flesh side down in the pan, sear for about 1 minute and then turn to a low heat.
 
COLOUR WHEN COOKED
COLOUR WHEN RAW

 
Cover the pan and cook until the shells change colour and become red. About 6 -8 minutes. When they are all done keep warm in a dish while you make the lemon butter. Add butter to the pan and when it just starts to get light brown, add granulated garlic or crushed fresh garlic and lots of lemon juice. simmer for about 1 minute and then pour into a sauce boat or any suitable container
 
BON APPETIT!!


Monday, 18 November 2013

When life gives you yolks.....make mayonnaise

As I'd just used the whites of 3 eggs to make some Macarons, I decided to make use of the 3 egg yolks by making a batch of delicious homemade mayonnaise. When I was a child we only ever had homemade mayonnaise and I always envied my friends who had jars of shop bought tangy mayonnaise full of tartrazine and sugar in their fridges. I now love the homemade kind. It's very easy to make and all the ingredients are natural. The egg yolks contain lecithin which emulsifies the oil and other ingredients together and the mustard also helps in the emulsification process as well as adding flavour.  Here is how you make it:

INGREDIENTS

3 teaspoons lemon juice
1 teaspoon Dijon mustard
½ teaspoon salt
3 large Free Range egg yolks
200 ml canola oil
100 ml extra virgin olive oil

Mix the oils together in a container that facilitates good control when pouring. Something with a spout is good.

Place the lemon juice, mustard, yolks and salt in the bowl of an electric mixer.

Mix well, for about 2 minutes.

Slowly start incorporating the oil into the mixture while the machine is running, a teaspoon at a time and then pour slowly until you get it to a steady stream. Run the machine on quite a fast speed. When the oil has all been slowly incorporated the mayonnaise will be ready. If you want it to be thinner in consistency, just add some boiling water, a teaspoon at a time, while the machine is running, until you are happy with the consistency. This makes about 1½ small jars of mayo. See photo.

macarons

My challenge at the moment is to learn how to make Macarons. They're really just fancy meringues, using almond flour and a couple of techniques to get them to look and act as they do. I now know that one has to bang the tray on the counter top once they are piped, and leave them to set for about 30mins before popping them in the oven. It's important that a "foot" forms during baking. One should use gel colour, not liquid otherwise the "batter" is too liquid. Most recipes say you need to bake them for 10 minutes, but it's actually more like 18 minutes in my experience.

Over the weekend I made a batch. This was my 3rd attempt. Actually my last attempt was more successful but I think I got more consistent sizing this time round. The "foot" on the macarons wasn't as well formed this time. I think it was either because the air was damp or because the almond flour wasn't fine enough. Some of them were cracked on the top and others were beautiful and smooth. Just gotta hang in there and one day I'll get them perfect.

One thing I love about Macarons is, that even if they don't turn out perfectly, they still taste sublime. I made some chocolate ganache to sandwich them together. 50:50 cream and chocolate. There aren't any cracked ones on the rack because they'd already been eaten.


Sunday, 17 November 2013

Products I like

Today I went shopping and here are a few products I particularly like.


From left to right:

My favourite. Such a brilliant idea. Bakers  Tennis Biscuit Crumbs. When you need to make a cheesecake or any tart that requires a biscuit crust, you can buy the biscuits already crumbled. Takes away the mess factor.

Red Rice from Thailand. Can't wait to try this. It's a new product for me.

New product from Koo. Sweet corn, peas and Red Peppers. Nice.

Carmien Rooibos tea with Honeybush and Hoodia. Hoodia is used by the Kalahari Bushmen as an appetite suppressant when out hunting and rooibos and honeybush are great for cleansing the digestive system and overall good health. Contains no caffeine.

Frey dark chocolate from Switzerland with Lemon and Pepper. Very unusual. Can't wait to try it.

Saturday, 16 November 2013

Wow, That's Amazing, Rice

This rice was one of my happy accidents. A combination of available ingredients that worked to produce a really tasty dish.


INGREDIENTS

1 cup brown rice.
1 onion, sliced.
125 g Portobellini mushrooms.
2 roasted red peppers. Sliced.
4 cloves of garlic, sliced.
10 green olives, pitted and slices.
2 Tablespoon capers.
1 Tablespoon pickled Jalapeno peppers. Chopped up.
12 Prawns.
50g butter
2 Tablespoons olive oil
¼ cup lemon juice
Cup of chopped coriander leaves.

METHOD

Cook the rice in the normal way and sieve.

Fry the onion slices until soft.
Add the mushrooms and allow to cook on a low heat, covered, for about 10 minutes.
Add the red peppers, garlic, olives, capers and Jalapeno peppers, and simmer covered for 10 minutes.
Add the rice and mix to incorporate everything. Place in a dish and keep warm.

In another pan heat up the olive oil and butter until the butter is melted. Season the prawns with garlic salt and fry until flesh is opaque. About 3-4 minutes. Add the lemon juice and cook for about a minute more.

Incorporate the coriander into the rice. Now place prawns on top of the rice and drizzle the lemon butter over the lot. Enjoy.


My Fast and Tasty Tom Yum Soup

I love the tastes of Thailand and there is nothing more comforting than the hot, sweet, sour and salty tastes of Tom Yum Soup. I love it so much that I've come up with a recipe to whip it up in a jiffy whenever the craving hits me. It's not totally authentic but tastes as close as dammit to the real thing.

INGREDIENTS

2 Tablespoons oil.

2 large Shiitake mushrooms, stalks removed and thickly sliced. If you don't have Shiitake mushrooms you can use button mushrooms or Portobellini  mushrooms.

1 litre chicken stock

4 lime leaves. I keep a jar of dried ones in my cupboard.

1 stalk of lemongrass. cut in half and crushed with a meat mallet (bruised). I do it like this because I hate getting bits of chopped up lemon grass in my mouth. You can keep them in the freezer.

1½  teaspoons grated ginger or galangal if you have it. I also keep ginger root in the freezer in a ziplock bag so it's always on hand.

2 birdseye chillies. I keep some dried in a plastic container. They last forever.

1½ Tablespoons palm sugar. If you only have granulated sugar that's fine, not a train smash.

1½ Tablespoons Fish Sauce.

1 Teaspoon paprika.

4 cloves garlic, minced.

The juice of one juicy lemon, or ¼ cup from a bottle. Or more, to taste.

2 spring onions chopped.

As many prawns as you want.

1 handful of Coriander leaves, finely chopped.


In a pot fry the shiitake mushrooms for a while, to bring out the flavours.
Add the chicken stock, lime leaves, lemongrass, ginger/galangal, chillies, sugar, fish sauce, paprika, and garlic.
Bring to the boil and simmer for 15 mins.
Add the lemon juice, spring onions and prawns and allow to simmer for a further 3 mins. Check for seasoning, add the coriander leaves and serve. Oops, this was so good, I was halfway through before I remembered to take a photo.


Friday, 15 November 2013

Summertime.........and the living is easy.........Breakfast time.......

How I love the warmer weather. (Sorry those in the Northern Hemisphere - you've had your 6 months in the sun. Now it's our turn. ) Breakfast in winter always makes me feel guilty afterwards. I know I should be eating more fruit and less bread and cheese, but when the weather is cold and wet (as only a Cape Town winter can be) all I want to do is cram in all the fatty carby food I can and to heck with the consequences. When the weather starts to warm up I find it so easy to stick to fruit and yoghurt. I can even manage without my comforting mug of coffee or 3 and drink more Rooibos tea, which is free of caffeine and high in anti-oxidants.

My favourite way of drinking Rooibos tea is to add a dash of lemon juice, a squirt of honey and a ½ tsp of Eve's Ginger Tea granules. Why is it so much easier to be healthy in Summer? This morning I teamed it with a bowl of mixed fruit salad (summer fruits - my favourite) a dollop of pineapple yoghurt, a drizzle of honey and a sprinkling of pumpkin seeds. Pumpkin seeds are super healthy. They are rich in all sorts of minerals and have anti-inflammatory properties, apparently.

Potato and Carrot Rosti


I've noticed that this Germanic potato dish has become very popular with celebrity chefs. I've also noticed, when watching reality shows such as Come Dine with Me, that most people have a problem with it's execution. When I first started cooking I was very afraid of Rosti. It looked so intimidating. I always managed to burn it and it always stuck to the pan. I love Rosti. Because of my Swiss father, it featured regularly on our menu when I was a child. Although my mother is Portuguese, she had learnt how to make my father's favourite. I was determined to get it right and this is the method I now use and it's always a success.

There are two ways of making Rosti. You can first parboil the potatoes in their skins, allow them to cool, preferably overnight in the fridge, remove the skins and then grate them, or you can grate them raw. The latter is the method I prefer because I like the texture of the finished product and because planning in advance isn't my forté. The only problem with grating from raw is that you need to move fast, because, as you probably know, potatoes turn brown quickly when exposed to the air.

INGREDIENTS

5 Medium sized potatoes
1 medium sized carrot (optional )
2 T olive oil or any good vegetable oil
1 knob of butter
seasoning of your choice- I normally use garlic salt, nutmeg and ground black pepper.

METHOD

Peel the potatoes and carrot and place in a bowl of water.

Place the pan on a hotplate with the oil and butter ready. A non-stick pan is preferable, otherwise use a little more oil or butter.

Grate the carrot and then the potatoes. You can use a hand grater (less to wash) or a food processor. You can also include grated onion which is always a nice touch.

Place the grated potatoes and carrot in a dish. Season and mix well .


Now put the hot plate on high until the oil/butter starts to sizzle and then turn down to lowest heat and add the potato/carrots and form into a nice round cake. All stoves are different. Use the plate that has quite a hot #1 setting, not your coolest plate.


Set the timer for 8 mins and after that put the heat up a notch and set the timer for a further 8 mins.

Turn the hotplate to high and stand over it until you have a nice crispy bottom, it shouldn't take long because the bottom is already slighty brown. Just a minute or two. Using a lifter make sure that the Rosti isn't sticking.

Slowly slide the Rosti out of the pan and onto a plate. Now place another plate on top and flip so that the raw side is underneath.

Slide back into the pan and repeat the process on that side.

Your Rosti is ready to serve. En Guete! (that's Swiss-German for "enjoy your meal")


Monday, 11 November 2013

Yellow apricot and almond pilaf

When I made Bobotie the other night I decided to make something more interesting than yellow rice with raisins. I cooked a cup of brown Basmati rice and added about a tablespoon of turmeric to the water.

In a pan I toasted ½ cup of almond flakes and set them aside. I then chopped up one onion and fried it on a low heat until soft. To that I added 8 small dried apricots, finely chopped and cooked them with the onions for about 10 minutes. To that I added 2 spring onions, 50 gm of butter, black pepper, the reserved almonds, and about 1 teaspoon of cinnamon. By the time the butter had melted it was ready to be mixed in with the rice. Just before serving I added a handful of mint leaves, chopped up finely.  Keep a few almonds to one side to garnish.

Bobotie

Italy has Lasagne and Greece has Moussaka, and South Africa has Bobotie. This is a truly delicious spicy, fruity baked ground meat dish that has it's origins in Indonesia. It was introduced to the Cape by the colonists of the Dutch East India Company and later on by the enslaved people of South East Asia whose descendants make up the Cape Malay people of South Africa. It is topped with a custard of milk and egg and baked in the oven. In South Africa it is traditionally served with yellow rice with raisins. This is the dish that South Africans crave the most when they're away from home for a long time.

When I make this dish I normally add my own blend of spices but most people just use curry powder and extra turmeric.

Here is how I make this quintessential South African dish.

INGREDIENTS for 4 people

500 g ground lamb or beef.
1 slice of white bread, crusts removed.
1 cup milk
2 Tablespoons oil
1 small onion, finely chopped
1 Tablespoon turmeric
1 teaspoon ground cumin
1 teaspoon ground coriander
1 teaspoon ground ginger
½ teaspoon ground cloves
1 teaspoon black pepper
1 teaspoon red chilli flakes
4 cloves garlic chopped
1 Tablespoon lemon juice
1 teaspoon lemon zest
1 handful of raisins
½ cup almond flakes
1 Tablespoon chutney
1 Tablespoon apricot jam
1 Tablespoon Worcestershire Sauce
2 eggs ( one for the meat mixture and one for the custard)
2 bayleaves

METHOD

Soak the bread in the milk.
In a pot, fry the onions gently until transparent and then add the spices and garlic.
Add the meat and cook for a couple of minutes.
Add the lemon juice & zest, raisins, almond flakes, chutney, apricot jam and  Worcestershire Sauce.
Squeeze the milk out of the softened bread and crumble it into the pot.
Add one of the eggs and mix everything well.
Pack everything into a dish and bake for 30mins in the oven at 180° C.

While it's baking for the first 30 minutes, mix the left over milk together with the other egg to make a light custard. Add a pinch of salt and turmeric.

After 30 minutes, take the dish out of the oven and pour the milk/egg mixture over the meat. Place 2 bayleaves on top and bake for a further 30 minutes.

Friday, 8 November 2013

Villa Chicken

This is a recipe that I've adapted from a chicken dish at the Villa Tavern in Cape Town, a Portuguese restaurant where my husband and I first met in May of 1995. Although it's not exactly the same, I like the idea of the chorizo sausage under the skin and in the cavity, and as I had some chorizo sausage left over from the pasta dish I made the other night, I decided to use it last night with the whole chicken I was planning on roasting.

INGREDIENTS

For the rub:
1 teaspoon smoked paprika
1 teaspoon ground cumin
½ teaspoon ground coriander
½ teaspoon cinnamon
1 teaspoon red chilli flakes or ½ teaspoon cayenne pepper
1 teaspoon crushed dried garlic
½ teaspoon black pepper
enough olive oil to make a runny paste


Rub the paste all over the chicken with your hands. Give it a good massage. Make sure you have a sink full of water because you will want to give your hands a good wash afterwards.

cut one lemon into quarters and put 2 of the quarters into the cavity of the chicken.

slice the chorizo up finely and insert under the skin of the breast and anywhere else you can get to. If you have any pieces left over, insert them into the space between the legs and the body. Tie the legs together with some string to hold them in place. You can also put some chorizo into the cavity with the lemon. Sprinkle salt on the chicken and the skin will be very crispy.

In the roasting pan put 1 glass white wine, 1 cup chicken stock, 1 onion cut up and some cloves of garlic. Then throw in a handful of coriander leaves. Also tuck some coriander leaves into the cavity of the chicken.

Place the chicken onto a rack in the roasting pan.


Roast for about 45 mins, depending on the size of the chicken, at 180° C


To make gravy put the contents of the roasting pan into a small container and blend. Sieve into a small pot, season if necessary (probably not) and add the juice of the other lemon half. Reduce the gravy and if necessary thicken with a little flour or corn starch dissolved in cold water. Do NOT put flour straight in because it WILL get lumpy.


This chicken works very well with any kind of potatoes.


Wednesday, 6 November 2013

Homemade Coffee Ice Cream

I recently acquired a Krups Ice Cream Maker from Banks Kitchen Boutique. As you can imagine I am using any excuse to make a batch and it certainly doesn't last long in my house. After trying various different recipes, this is the one I like the most, because it's versatile and creamy. This recipe is for a coffee flavoured ice-cream, but you can adjust it to any flavour. For example, instead of the coffee beans you can use a vanilla bean. Just cut it open and scrape out all the seeds, and put the pod in as well. When you sieve the mixture the little seeds will stay behind. Or you can add purréed fruit such as strawberries.

Ingredients.

80 gm coffee beans
500 ml cream
250 ml full cream milk
170 gm caster sugar
2 x-large egg yolks
1 x-large whole egg
2 Tablespoons coffee liquor (I use Kahlua)

The reason for the liquor, besides the fact that it tastes so good, is that alcohol stops ice-cream from going rock hard in the freezer. It helps keep the consistency creamy. So if you want the effect of the alcohol but not the flavour, you can even use vodka which is relatively flavourless. But not too much, otherwise it won't set.

Combine the cream and milk in a pot with the coffee beans and heat to 80° C. If you don't have a thermometer than take it off the hot plate when you see the first bubble appear. ie: just before it boils.

Leave to one side so that the beans can flavour the liquid. About 30mins.


Using a hand mixer, blend eggs and sugar until light and fluffy.

Strain the cream/milk mixture to remove the beans.

Add the cream, a spoonful at a time mixing in-between for about 5 spoonful's and then pour the rest of the mixture in and combine until well mixed. Warm up on the stove top until hot but not boiling. Add the coffee liquor and then give it a couple of stirs. Allow to cool.

Store in the fridge for at least 12 hours if you are using an ice-cream maker. It must be really cold when it goes into the bowl of the ice-cream maker, which will have been in the freezer for at least 24 hours.

If you are using an ice-cream maker, follow manufacturers instructions. If not,  place in the freezer and stir every half hour or so to break up the ice crystals until it is ready to eat. Yum Yum.


Smokey Chicken and Chorizo Linguine

I absolutely LOVE the flavour and aroma of smoked paprika. Although this is a pasta dish, I have made the sauce with a very Spanish/Portuguese character.


INGREDIENTS for 4 people

A few glugs of olive oil                                                              
½ onion chopped finely (the chopper on the right is great if you have sensitive eyes)
½ green pepper chopped finely
1 long celery stalk chopped finely
½ red pepper  - sliced
½ yellow pepper - sliced
4 cloves of garlic - sliced
125 gm button mushrooms, sliced.
15 black olives. remove pips and chop up into small bits
1 chorizo sausage finedly sliced
350 gm chicken fillets cut into small bite sized pieces.
1 can chopped tomatoes
1 teaspoon smoked paprika
1 teaspoon chilli flakes (this is optional)
¼ cup grated parmesan cheese, plus extra to sprinkle on at the table.
a large handful of fresh basil leaves.
Salt & Black Pepper


METHOD

Gently fry the onion, green pepper and celery in a large pan until soft.
Add the red and yellow peppers and fry for another few minutes
Now add the garlic and allow to cook for a couple of minutes.
Now add the mushroom slices put a lid onto the pan and allow to simmer for about 5 mins.


In the meantime, in another pan, fry the chorizo until crispy and set aside. Now brown the chicken in the same pan, seasoning it with salt or celery salt while it is in the pan.
Transfer the deliciously crispy Chorizo and the browned chicken to the large pan with the vegetables.
Sprinkle on the smoked paprika, chilli flakes and olives.
Pour in the can of chopped tomatoes and mix together. Season with salt & pepper.
Put the lid back on and simmer for 10 - 15 mins.

While the sauce is simmering, cook the linquine. If it is dried, it should take 10 mins. Fresh will only take about 6 minutes. Remember to always cook pasta with lots of water  and high heat. The water should be boiling and bubbling while it cooks, and the pasta will not stick.

When the linguine is cooked, transfer directly from the pot, with spaghetti tongs, directly to the pan with the sauce, sprinkle on the parmesan cheese and the basil leaves, and toss around so that the pasta is properly coated with the sauce and the basil leaves just wilt slightly but stay green. Looks good and tastes even better. Bon Appetito!!!

Tuesday, 5 November 2013

Easy Peasy Chicken Pie

Don't you just love ready made pastry? Makes life so much easier, although I must say there is something rewarding about making your own. However, sometimes it's just not necessary and this pie always looks so spectacular every time. And it's not as difficult as it looks.

For this pie I use a non stick cake tin. The sort that one uses for layer cakes. It has a nice lip which makes it easy to seal the pastry edges.


You need 1 packet of ready rolled short pastry for the bottom and one of puff pastry for the lid.

The INGREDIENTS for the filling are as follows:

½  large onion, diced
1 small green pepper, diced
2 small carrots finely diced
4 cloves garlic, sliced
1 punnet button mushrooms, quartered
190 gm diced bacon
400 gm chicken fillets cut into small pieces. (bite size)
1½ Tablespoons chopped fresh sage.
250ml white wine
250 ml milk
250 ml Chicken stock
3 teaspoons corn starch. (Maizena)
1½ Tablespoons chopped fresh parsley.
Salt and pepper

METHOD

Saute the bacon in a small pan and set aside. Do the same with the chicken just to sear the edges.

Fry the onion, green pepper and carrots in a pot on a low heat until the onions are soft and transparent.

Add the garlic and fry gently for a couple more mins.

Add the bacon and chicken to the pot along with the mushrooms and sage.

Pour on the white wine, milk and chicken stock and bring to the boil.

Simmer on the lowest heat for 20 mins.

Thicken with the corn starch and add parsley, salt & pepper.

Very Important: Make sure that the sauce is not too runny.

TO ASSEMBLE THE PIE

Lightly grease the non stick cake tin

open out the short pastry and roll out until it is big enough to fit in and around the tin. Place in tin. Cut away excess pastry.

Using a slotted spoon transfer the filling to the pie. Make sure that the gravy is not too runny and only add enough to moisten the pie once all the solid filling has been added. If the sauce is too liquid reduce down or add more corn starch.

Now place the puff pastry on top and trim to match the bottom. Crimp around the edges with thumb and forefinger or use a fork.

Beat one egg with a little milk and brush over the lid. You can also cut some decorative shapes with the left over pastry as I have done. Very easy but looks pretty cool. Don't forget to cut a slit or two in the lid to let the steam out while it bakes.

Bake in a 180° C oven for 40/45 mins but keep an eye on it.


To remove it from the tin, just wait for it to cool a little and then place a plate on top and flip over. Place a plate underneath and flip again so that it is right side up. And voila!!! Your friends and family will be SO impressed.


Monday, 4 November 2013

Sunday Roast

My family LOVE a Sunday roast and all the trimmings.  Yesterday I acquired a rather luscious piece of beef and decided to give it a go. It was Topside, which can be rather hit or miss when it comes to tenderness, but this turned out perfectly. Tender, tasty and perfectly med-rare. I chopped up some onions, carrots and celery sticks and placed them in a small roasting pan. Added some sprigs of fresh thyme and a whole head of garlic. I separated the cloves but left them in their skins. Sprinkled a few peppercorns, seasoned the meat with garlic salt, placed it on top of the vegetable and herbs, and drizzled olive oil over the whole lot.


The best way to roast beef, I've discovered, especially if you want it to be nice and med-rare, is to roast for a shortish time on a high heat. This piece was 1.2kg and I roasted it for 50mins at 210C. I then left it to rest for half an hour. This is very important, as it allows all the juices to settled down so that when you slice it, it remains juicy.

The garlic had gone a yummy caramel colour and when I squeezed the skins the garlic all squished out. I blitzed the vegetables and garlic and after sieving out all the hard bits incorporated it with some beef stock for gravy. Also added some white wine.


The saying in my family is that you can never have too many roast potatoes, so I always make extra, and they always get devoured. My method is to parboil first. I've tried both. Parboiling, and roasting from raw, and parboiling in my opinion always makes a better roast potato. After boiling them for about 8 mins, I shake them around a bit in the pot (after removing the water) and the edges get nice and rough. This helps them get ultra crispy. I then drizzle them with olive oil and lots of salt and pepper, shake them around some more, and pop them in the oven until they're ready. I turn them around every once in a while so that they roast evenly.

Now all that's needed are the veggies, a glass of good red wine or 3 and BON APPETIT!


Sunday, 3 November 2013

Let me introduce myself

Hi, I'm Lisa. This blog is dedicated to my favourite pastime: food and it's preparation. Cooking, baking and all things delicious. I just love the aromas at my favourite spice emporium and the cute packages and labels that adorn them. Design is another love of mine and I am actually by profession a fashion designer and cad artist. So I'll be keeping things pretty eclectic.

A bit of background. I grew up in a restaurant in Hout Bay near Cape Town, South Africa. It was this that first instilled in me a love of food and cooking, but also made me realise that I didn't, at that time in my life anyway, wish to go down that career path. Our lives revolved around the restaurant, and when other families were going out for Sunday lunch or tea and scones, we were serving the lunch and the scones. No rest for the wicked.

 It was very much a love/hate relationship. My parents worked very hard with the help of their 4 daughters ( I and my 3 sisters) to make the restaurant, which was called the Red Sails Inn, a success. We specialized in sea food mostly. Cape Rock Lobster (crayfish), Prawns and Kingklip.  My father, being of Swiss origin had a classic culinary training and the Red Sails was famous for it's Crayfish Thermidor and my mother who was Portuguese produced the most delicious Prawns as found only in Lourenco Marques, her home town in Mozambique.


 After many years in the clothing industry working as a fashion designer, I'm now spending more time at home, less time in the rat race, and more time to cook. Yay!!! I've been experimenting a lot with all sorts of new tastes, such as Moroccan Cuisine and also the flavours of the Caribbean. I've also been baking more than I've ever done before.

 Well that's enough about me, what's for dinner?